Wednesday, 29 March 2017

Getting started with container technologies

Getting started with container technologies


Containers and the tooling around it is currently grabbing the attention of many people; developers can containerize a whole application and deliver it to run without needing to install anything on the host. Ops don't have to set anything up (on the hosting server that is, so no application installs) and management will love the promises of easier deployment, faster delivery and more agile release management techniques.

Tooling  


Everyone has heard of Docker, the most well known container runtime, but there are numerous methods of managing, running and orchestrating containers. I'll be looking at them in depth and providing notes as part of blog entries as part of my learning, and hopefully they provide some use to you.

The options for running containers are
1. Docker
2. Containerd,
3. runc, and
4. rkt

Docker was easy to pick up - I've been playing with it since the last quarter 2016 - though I am sure production implementations would need more time and administrative effort around availability and discovery.  I've been wanting to spend time around rkt and will write up any useful notes as I go.

Running containers, either in docker images or App Container Images can be run and orchestrated in clustered environments using a number of technologies better suited to operation and deployment. I will try to introduce those as part of this blog series as well.

Cheers
Quintes

Connect with me on LinkedIn or Twitter


Saturday, 14 January 2017

Xubuntu 14.04.x Hardware Enablement Stack (HWE) EOL and disappearing mouse cursor

Xubuntu 14.04.x Hardware Enablement Stack (HWE) EOL and disappearing mouse cursor


It may surprise many people but I run Linux at home. I actually ran CentOS for a number of years as a desktop / server and then moved to Xubuntu around 2009, and have 2 laptops running it in various versions and flavours since. Let me start this by saying I heart xubuntu.

Around a month and a half ago I received a popup in Xubuntu 14.04 stating that my HWE stack was going to stop receiving updates for the kernel and graphics stack. A wiki article stated it should be fine to update to the xenial stack. Sounds critical and I responded with enough due diligence to believe my primary home laptop would upgrade fine.. in the process my intel video drivers got groggy and would cause the mouse cursor to disappear whenever (every time) I returned from sleep / a locked screen.

Pre-HWE EOL  


I've been running Xubuntu 14.04 x64 as a my primary machine for a long while. Developer tools, docker, java, lamp, virtual boxes etc. Intel video. Nothing fancy.
  
I upgraded after reading through the mentioned article and getting the warnings as expected

 sudo lsb_release -d
 hwe-support-status --show-replacements
 hwe-support-status --show-all-unsupported

I was running the relevant kernel, followed the steps to upgrade, not reinstall from scratch. My machine kept going but noticed that my cursor would disappear when unlocking from the light locker. I was kinda busy and didn't want to fix so found the common fix which is change from vt1 to vt7. 

I wish I'd taken more notes, but appears that I was bumped from a 3.13 to a 4.2 Kernel. I think I was somewhere refered to this and installed everything as per the 14.04 Desktop step. 

Now what's worse is that I had taken the other machine last week and performed a fresh install of Xubuntu 14.04.5 on it and this happens. New install or upgrade, same issue. In that instance I went and re-installed Xubuntu 14.04.1 and my cursor comes back as I'd expect so it's a new bug.

Getting my cursor back


Today I traced through a couple of articles and bug trackers and found that I was not alone. Note that this is still happening in xubuntu 16.04 which mentions the following under known issues on the release notes page, as at this date - "When returning from lock, the cursor disappears on the desktop, you can bring the cursor back with Ctrl+Alt+F1 followed by Ctrl+Alt+F7"

Now I want my wife to use my laptop for a specific purpose under a standard desktop users - can you image that discussion with someone who doesn't use linux or worse is not used to 30 keyboard shortcuts after a login. A poor, annoying workaround kept me going but not suitable.

Where else is this happening? 

Here. Every other workaround there is great, if you don't have to explain it.

Note I'd tried restarting lightdm, it kills your workspace and not suitable. Installing gdm? I gave that a spin earlier, do not do it. It killed my notifications bar, panel shortcuts etc. 
I quickly uninstalled gdm and purged/reinstalled light-locker. 

  sudo apt-get remove gdm
  sudo apt-get remove light-locker
  sudo apt-get purge light-locker
  sudo apt-get install light-locker

Man is it pretty in comparison. My Indicator plugins and panels loaded properly as I hoped too.

Ubuntu Bug Ticket - same workarounds mentioned and I noted that it was fixed in xserver-xorg-video-intel in Xenial. 

So I thought I'd just upgrade that since I'd installed the Xenial packages as per the HWE EOL wiki. 

sudo apt-get install xserver-xorg-video*

When I tried I saw that some dependencies would not be met. So I tried to reinstall all of it 

sudo apt-get install --install-recommends linux-generic-lts-xenial xserver-xorg-core-lts-xenial xserver-xorg-lts-xenial xserver-xorg-video-all-lts-xenial xserver-xorg-input-all-lts-xenial libwayland-egl1-mesa-lts-xenial 

I shouldn't have done this, because I got a new 4.4.0.59 kernel and then my /boot proceed to run out of space - fixed that and retried. All appeared OK and I tried to lock and unlock - cursor continued to disappear.

I then decided to reboot and try after that. Kernel panic ensued and thankfully my 3.13 kernel was still available. So I booted with the 3.13 kernel, and by then was pretty mad. I forced trusty back

sudo apt-get install --install-recommends linux-generic-lts-trusty xserver-xorg-core-lts-trusty xserver-xorg-lts-trusty xserver-xorg-video-all-lts-trusty xserver-xorg-input-all-lts-trusty libwayland-egl1-mesa-lts-trusty
sudo dpkg-reconfigure linux-generic-lts-trusty
 After that I changed my grub config to use the old 3.13 kernel as default and had to hack the defaults to not use the 4.4 Kernel

sudo nano /etc/default/grub
GRUB_DEFAULT="Advanced options for Ubuntu>Ubuntu, with Linux 3.13.0-107-generic"
sudo update-grub
Rebooted, logged in and out and surprise - my mouse cursor is back.

Of course checking the HWE I seem to be covered but I'm sure I've broken something, and an apt-get update later will probably bring some pain.

hwe-support-status --verbose
Your Hardware Enablement Stack (HWE) is supported until April 2019.

This issue actually shouldn't be happening, in my opinion those release notes and ticket should be resolved by now. The lesson here is always test upgrades somewhere else before you play on your primary machine.

@quintes


Saturday, 17 December 2016

Azure Logic Apps and Enterprise Integration Tools quick look part 3 - setup


Azure Logic Apps Enterprise Integration Tools quick look part 3 - setup Azure Logic App and Integration Account


My previous posts provided a very high level overview of the Azure Logic App workflow and the steps to create a new Integration project in Visual Studio. We will now look at the setup in Azure to get all the services talking.

Create the Azure function


I created an Azure function container, and deployed a function from a template using this link

Create the Logic App


Really easy, just log into the Azure portal and create a new Logic App here. Once that's done don't do anything in the Designer, we can do that after having created and configured the Integration Account.

Create the Integration Account


The Integration Account is part of the Enterprise Integration Pack, used to store all the integration schema, maps and accounts for your specific integration requirements.


Click New -> Market Place -> Everything and search for "Integration Account". Create the account by completing all the necessarily fields.

Link the Integration Account to the Logic App

Associate the Integration Account with the Logic App to hook up all the integration bits. In your Logic App, find and configure the Integration Account under Settings

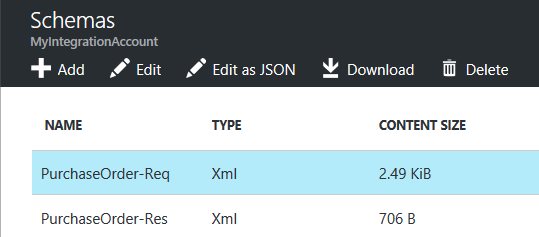
I have very quickly created Partners, Agreements, Schema and Maps for the purposes of getting the workflow running Take a look at the documentation to see what is required. In particular I used the xsd schema and the xslt map built in the Integration Project I created in part 2.


Create the workflow and link the integration artefacts


Now open the Logic Apps designer and drag in the 4 actions from part 1. Those would be an HTTP Request, XML Validation, XML Transform and HTTP Response action respectively.

Configure the XML Validation step to use the Body and specify the schema name specific to this action.


Configure the XML Transform step to use the Azure function and Azure function container you've created as well as the same Body variable, and specify the map (the resulting xslt file from the Biztalk integration project).


Finally configure the HTTP Response to return the output (The transformed XML) to the caller.


Give it a spin

Once again, trigger the workflow by submitting valid XML from either Postman or curl. Take a look at the Run result in the Overview blade of the Logic App and it should show you a successful flow through each action.

I hope the 3 part series has helped give you an idea of how to use this new technology in Azure. I continue to learn and hope that my notes here help somewhat.

@quintes


Sunday, 11 December 2016

Configure Redis Sentinels on ubuntu


Configure Redis Sentinel on ubuntu


I did this a long time back and this post details how it is done. I don't want to forget again. This is all done using localhost for simplicity on my laptop.

Install Redis


Install redis as necessary. Digital Ocean has a super article on the steps to follow.

Configure Sentinel


I created a github repo containing most of the config and bash scripts. Grab that and run it as follows

The idea is as follows:

Master Redis running port 6379 and a sentinel 23679
Slave 1 running port 6380 and sentinel 23680
Slave 2 running port 6381 and sentinel 23681

Run the Master

  redis-server $PWD/master/master-redis.conf

Test
  redis-cli -p 6379
  set bob 123
  get bob

Run the main sentinel

  redis-server $PWD/master/sentinel.conf --sentinel

  you will see the sentinel monitor
        +monitor master redis-local-cluster 127.0.0.1 6379 quorum 2

Run Slave 1

  redis-server $PWD/slave1/s1-redis.conf
  We can tell it is a slave:
        MASTER <-> SLAVE sync: Finished with success

Run Slave 1 Sentinel

 redis-server $PWD/slave1/s1-sentinel.conf --sentinel

 Connecting and working
        +monitor master redis-local-cluster 127.0.0.1 6379 quorum 2

Run Slave 2

 redis-server $PWD/slave2/s2-redis.conf

 Connecting and working
      MASTER <-> SLAVE sync: Finished with success

Run Slave 2 Sentinel

 redis-server $PWD/slave2/s2-sentinel.conf --sentinel

 Connecting and working
        +slave slave 127.0.0.1:6380 127.0.0.1 6380 @ redis-local-cluster 127.0.0.1 6379
        +slave slave 127.0.0.1:6381 127.0.0.1 6381 @ redis-local-cluster 127.0.0.1 6379
        +sentinel sentinel 01105752f94e78d38cab212f30a53ad139e09979 127.0.0.1 26379 @ redis-local-cluster 127.0.0.1 6379
        +sentinel sentinel 9348999cde7c3aa05dda31746e95f0fb964e1055 127.0.0.1 26380 @ redis-local-cluster 127.0.0.1 6379

Test using the redis-cli

  Connect to the main sentinel:

  redis-cli -p 26379
  127.0.0.1:26379> INFO [section]

  Returns:
    # Sentinel
    sentinel_masters:1
    sentinel_tilt:0
    sentinel_running_scripts:0
    sentinel_scripts_queue_length:0
    sentinel_simulate_failure_flags:0
    master0:name=redis-local-cluster,status=ok,address=127.0.0.1:6379,slaves=2,sentinels=3

  Figure out who is the master, asking slave 2
    redis-cli -p 26381 sentinel get-master-addr-by-name redis-local-cluster
  Returns, as expected:
    1) "127.0.0.1"
    2) "6379"

Test the slaves, ensure slaves are syncing
  Connect to the master redis

  redis-cli -p 6379
    127.0.0.1:6379> set mykey 123
    OK

  disconnect and connect to the first slave:

  redis-cli -p 6380
    127.0.0.1:6380> get mykey
    "123"
    127.0.0.1:6380>

Test the failover

  Kill the instance of redis which was started first

  Taking a look at the first sentinel output, we can see the redis instance went down
  Directly thereafter they all agreed on who to make the master

    +sdown master redis-local-cluster 127.0.0.1 6379
    +new-epoch 2
    +vote-for-leader 96f6cfd4193108b326fb15d1adbfb2ecc630ff97 2
    +config-update-from sentinel 96f6cfd4193108b326fb15d1adbfb2ecc630ff97 127.0.0.1 26381 @ redis-local-cluster 127.0.0.1 6379
    +switch-master redis-local-cluster 127.0.0.1 6379 127.0.0.1 6381

  The new master is on port 6381, lets try connect
  First check who the sentinel thinks is the master, ask either of the slave sentinels:

  redis-cli -p 26380 sentinel get-master-addr-by-name redis-local-cluster
    1) "127.0.0.1"
    2) "6381"

  Agreement, so lets see if we can set a key on what was previously a slave:

  redis-cli -p 6381
    127.0.0.1:6381> get mykey
    "123"
    127.0.0.1:6381> set mykey newhere
    OK

  Did it sync to 6380?
  redis-cli -p 6380
    127.0.0.1:6380> get mykey
    "newhere"
    127.0.0.1:6380>

  Performing an INFO on the main sentinel (which actually could've gone down too ) indicates that it too knows who is the new master
    # Sentinel
      sentinel_masters:1
      sentinel_tilt:0
      sentinel_running_scripts:0
      sentinel_scripts_queue_length:0
      sentinel_simulate_failure_flags:0
      master0:name=redis-local-cluster,status=ok,address=127.0.0.1:6381,slaves=2,sentinels=3

All good.

Summary


This hopefully gets anyone else up and running quickly

@quintes

Saturday, 10 December 2016

Azure Logic Apps Enterprise Integration Tools quick look part 2 - creating the integration artifacts

Azure Logic Apps Enterprise Integration Tools quick look part 2 - creating the integration artifacts


My previous post provided a very high level overview of creating an Azure Logic App which uses the Azure Logic Apps Integration Pack to accept XML messages from an HTTP trigger. However we need the XSD and Map file to get the logic app working in terms of XML Validation and Transform.

We are going to quickly create the Integration Project using Visual Studio 2015 for the purposes of this proof of concept.

Download the Azure Logic Apps Enterprise Integration Tools


Download and install the tools from here, and let us create a new Integration Project

Create the Project


In Visual Studio, create a new project by going to New Project, Biztalk and Integration.


Once created you should have a pretty bare bones project. We'll create 2 schema files and then the actual map. The map can be created using a designer and the resulting output is an XSLT file used to perform the XML transformation.

In my instance I used an old purchase order schema found on the Microsoft website and created my own Response schema, just to get things moving.

One thing I noted is that I had added my XSD manually and it did not work on the Map designer. Perhaps the Biztalk namespace was not included and could have been the reason. Anyway, it worked fine when creating 2 new schema via the "Add item" and filling in the schema implementation as you need.


After the schema have been created, use "Add Item" to add a new Map. Choose the source schema, then the destination schema and drag and drop your transformation steps. There are many components here and some trial and error will get you what you need. I did try using the Test Map function on the map.btm file, and found that the experience could be richer.

Here is how my map looks


After you are happy that it all looks and works as expected, build the project and you should find an xslt file in the build folder. We should now have all the artifacts we need to setup the Logic App and Integration Account in Azure. We'll do that as part of a separate post.

In closing, you will need the following for the next steps:
  1. The Source and Destination schema (Mine are PurchaseOrder and PurchaseOrder_Res)
  2. The XSLT build from the Map


Move on to part 3 (coming soon) and configure your Azure Logic App to test out the Integration workflow.

Update - Part 3 here

@quintes


Monday, 5 December 2016

Azure Logic Apps and Enterprise Integration Tools quick start


A quick look at Azure Logic Apps Enterprise Integration Tools


Azure Logic Apps allows you to quickly build integration solutions using a visual designer to define the flow of the data between various cloud and on-premise data connectors. As I started to use logic apps it seem at first as if JSON was the first choice in terms of content types, but XML and integration around XML is supported using the latest Azure Logic Apps Enterprise Integration Tools.

Moving XML EDI and Integration into the cloud


Core to what I was interested in was having an endpoint provisioned to automatically receive an HTTP request with minimal effort. My next requirement was that I should be able to validate the XML against a known schema - we want to validate data before going to far. If I passed that step I wanted to either process the message or put it on the queue. Lastly, I wanted to end the workflow with a response indicating the status.

This is how it looks at a high level:


The example is trivial but meets the requirement and gives a good idea of what the Logic Apps and Enterprise Integration Tools are capable of and where it may go in the future. Support for EDI and EAI via file and XML using standard industry protocols is available. I won't delve into the specifics of message formats but the flow below should be suitable as a starting point for implementing more advanced message handling.

Using these Enterprise Integration Tools allows you to define BizTalk schema which can be used for transforming data once that data is received via a trigger. It is really impressive to see how quickly you can define the Http Request as a trigger, validate and transform the data using the Logic Apps designer as well as the Enterprise Integration Tools in Visual Studio 2015. Let us take a quick look at getting started.

Getting started


Log in to Azure and create a new Logic App if you have not already done so.

The follow-up posts will help to break this into more detail but for now you will also need
  1. An Azure function container and Azure function to run the transform. This is the serverless infrastructure, a hot topic at the moment. Imaging running just a function in the cloud, without worrying about a full API to support it, nor having to worry about the deployment and management of the infrastructure.
  2. An Azure Integration account configured and linked to the Logic App
  3. Specific agreements, partners, schema and maps to transform the XML
  4. Postman or curl to POST the requests to trigger the Logic App
With all that in place, we can start with linking a few actions together as shown earlier.

The first action is the HTTP Request, the trigger which will start this workflow when an HTTP endpoint receives a message.

HTTP Request


The Request Action mentions JSON which may through you off, but it will work perfectly fine with XML. As soon as you save the Logic App the URL should be provided. We'll use this to post our first message.

XML Validation


I've set up some schema which we will look at later, for now it is sufficient to know that the Body comes from the trigger (the HTTP Request Body) and I want to validate it against a purchase order schema (.xsd) file. If that fails the response will return immediately with an error.

XML Transformation


Create a Transform action, and configure it as necessary.


In the next post I'll show more detail on how I set this up. The goal here is to run the transform via an Azure function using a specified schema and Map to transform my demo purchase order to a response.

HTTP Response


Should the Transform succeed, I want to return the transform to the caller. Trivial, but the point is to validate the possibility. I will take the output of the previous action for the response body:


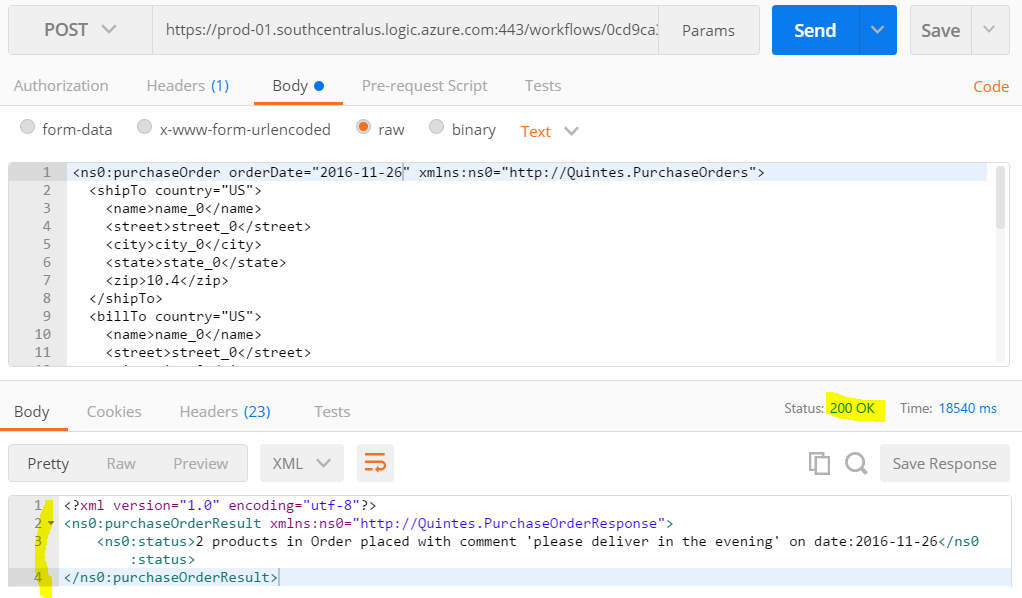
Let's try it out by making a POST via postman


The response is possibly not the best message, and it may actually need to be XML so we'll solve that another time.

Let us take a look at the Logic App and see if we can figure out where it went wrong. Go to the Logic App Overview blade, and look at the most recent error in All Runs. Here it is quite clear I couldn't pass my XML schema validation check, so I can check that off successfully.

Of course as the workflow becomes richer we can take decisions and actions based on these outputs.

If we sent a proper message what would happen then?


The response indicates a 200, that's perfect for getting started, so how did the run look?


So all actions passed and the response returned 200 OK, the response body actually contains data which came out of the Transform step:


Summary


This four step workflow is a quick proof of concept on how we could move our XML messaging capability to Azure Logic Apps and use various other Azure Services to build sophisticated solutions to Enterprise Integration.

I will follow up with more posts on the specifics of setting this up and seeing how the Logic Apps Enterprise Integration Tools can be used to define the transform. Hopefully this helps in starting to think about Enterprise Integration challenges and their solutions in the cloud.

Update - Part 2 here
Update - Part 3 here

@quintes


Monday, 27 October 2014

Git log search for term or follow file

I've been tracking down file changes quite a bit lately in git.. Here's how:

Look for a specific word or term

git log -g --grep=SEARCH_THISgit log -SSEARCH_FOR+THIS

Look for changes to a specific file?

git log --follow somefile/somewhe.re
gitk somefile/somewhe.re
git log -p somefile/somewhe.re

git log -pfollow -p file

Isn't tracking down whodunnits fun?