Azure Logic Apps Enterprise Integration Tools quick look part 2 - creating the integration artifacts
We are going to quickly create the Integration Project using Visual Studio 2015 for the purposes of this proof of concept.
Download the Azure Logic Apps Enterprise Integration Tools
Create the Project
Once created you should have a pretty bare bones project. We'll create 2 schema files and then the actual map. The map can be created using a designer and the resulting output is an XSLT file used to perform the XML transformation.
In my instance I used an old purchase order schema found on the Microsoft website and created my own Response schema, just to get things moving.
One thing I noted is that I had added my XSD manually and it did not work on the Map designer. Perhaps the Biztalk namespace was not included and could have been the reason. Anyway, it worked fine when creating 2 new schema via the "Add item" and filling in the schema implementation as you need.
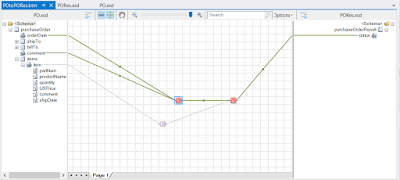
After the schema have been created, use "Add Item" to add a new Map. Choose the source schema, then the destination schema and drag and drop your transformation steps. There are many components here and some trial and error will get you what you need. I did try using the Test Map function on the map.btm file, and found that the experience could be richer.
Here is how my map looks
After you are happy that it all looks and works as expected, build the project and you should find an xslt file in the build folder. We should now have all the artifacts we need to setup the Logic App and Integration Account in Azure. We'll do that as part of a separate post.
In closing, you will need the following for the next steps:
- The Source and Destination schema (Mine are PurchaseOrder and PurchaseOrder_Res)
- The XSLT build from the Map
Update - Part 3 here
@quintes


No comments:
New comments are not allowed.